
The Magic Recipe for Ginger Cookies with Icing
30 November -0001

Before we start to hand out icing shots why don't we take a moment to celebrate the incredible journey these little biscuits have made. An ancient root itself ginger has been grown in China and India for over 5,000 years--mainly for its healing powers. But how did it end up in your oven?
From the land of silk to the royal table
Ginger was brought to Europe by the Silk Road. During the Middle Ages it was as nearly as precious a spice as gold. Legend has it that an Armenian monk, Gregory of Nicopolis, brought gingerbread to France around 992. He taught French Christians to bake this confection, and the tradition spread.
At first these concoctions were much more like dense cakes or bread. It was only later, especially in England and Germany, that the version we know today, thin and crispy like a biscuit, began to emerge.
Did you know that Queen Elizabeth I of England has been credited with creating one of the first gingerbread men? She instructed her bakers to whip up cookies resembling members in council and foreign delegates coming to present their credentials. This was a form of sweet diplomacy!
These days, ginger cookies symbolize the holiday season. They are a synonym for warmth, family, and caring. But honestly, they are too good to be restricted to just one month out of twelve in the year.
You could eat your cookies plain and they would be excellent. The zing of ginger goes well with the sweetness of molasses or honey. Yet install icing and a simple snack becomes an edible masterpiece.
Balancing tastes
From a taste perspective, icing gives a sweetness and gentle smoothness that offsets perfectly with the harsher spices of a cookie. Tasty things piling onto the more fragile cookie. It's the yin and yang of cooking.
A visual feast
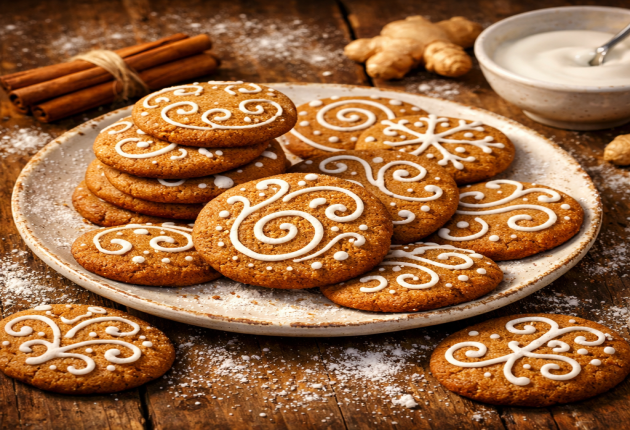
Feast begins with the eyes. A carefully decorated cookie, with crisp white lines or vibrant colors, captures attention immediately. This is a chance for the artist in people to blossom! Whether you are an artist who takes care in every detail or enjoy starry patterns, decorating cookies is a therapeutic activity. It is also a great way for kids to get involved in the kitchen, even if it means just a bit more clean-up afterwards!
These cookies are my faves. They hold their shape in the oven, which is essential to decoration--while staying soft inside and crisp on the edges.
Beat the egg white (or reconstituted meringue powder) with the lemon juice until the mixture foam.
Add the powdered sugar gradually at low speed while continuing to beat.
After all the sugar has been put in, turn up the speed and beat until you have stiff, glossy peaks (about 5 minutes).
Stiff consistency: Just out of the mixer as it is. It is used for tracing edges and small details—or anywhere that the icing needs to keep its shape.
Flood Consistency: Take some of the stiff icing and add water to it, a few drops at a time. When it's right, as you trace a line through a spoonful of it in the bowl, the surface becomes smooth again within 10 to 15 seconds.
With a piping bag filled with stiff icing and a very fine tip (No. 1 or 2 in size), take the bag directly onto positives of your cookie's line—dry for a few minutes.
Use the fluid icing (in a bag or squeeze bottle) to fill the inside of the outline. Use a toothpick to spread the icing into small corners and burst air bubbles while doing so.
If you want dots or marbling, put drops of colored fluid paste right on top of your still-wet paste. When the color melts together you'll have a nice surface that's not too rough.
After the base is dry, add things like buttons, eyes, scarves or lace patterns in the stiff icing; else use lines and dots in fluid icing if you're just starting out and want to create more of a collage effect across your cookies.
Making ginger cookies with icing is far more than a matter of simple cooking. It is a celebration of the season, an outlet for imagination, and, most important, an unbeatable means both to warm the heart and please the palate with the ones who are dearest to you.
Whether you make them for a Christmas party, in order to give people little presents they can eat or just for the pleasure of a home-made snack on Sunday, I hope this recipe brings you as much happiness as it gives me. Decorating mistakes are no mistake at all–a slightly crooked cake has just as much character (and exactly the same delicious taste) as one that’s perfectly rectangular.
So, take out the molasses, turn on the oven, and let the fragrances of the spices weave their spell. Enjoy it!

Hello, We’re content writer who is fascinated by content fashion, celebrity and lifestyle. We helps clients bring the right content to the right people.


We must explain to you how all seds this mistakens idea off denouncing pleasures and praising pain was born and I will give you a completed accounts..
Consultation
Showing 0 verified guest comments