
The Magic Recipe for Ginger Cookies with Icing
30 November -0001
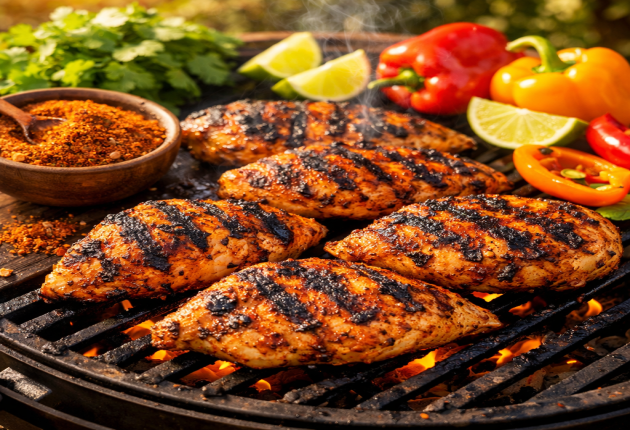

There are thousands of ways to cook chicken, but few of them involve an input-almost-zero-output huge payback like this one. What makes this recipe special is that it gives you total control over flavor. By making your own spice blend for tacos, the preservatives, extenders, and excess salt often found in commercial seasoning mixtures are eliminated; this is a good thing for both health and taste. They also allow for adjusting the heat level to your own taste, increasing the smokiness, or adding another touch of herbs.
It is also a recipe that comes close to universal. The use this chicken can have is as versatile as the entire sum of languages on the planet. You might think of the chicken as filling part in a taco., But it can be a protagonist in your burritos, hat rice bowl with bright color, and one great source of Friday night nacho protein. Also, the recipe is perfect for meal prepping. Even after being a few days in the refrigerator, the chicken still holds onto its flavor and the juiciness. Culturally, while this is not a dish strictly traditional of Mexico it learns from dry rub techniques used in Tex-Mex cookery and celebrates the union of grilled meats with earthy spices. It's a recipe that rescues busy weeknights, but feels like a feast prepared with tender love and care.
Here is the recipe for homemade taco seasoning. The ingredients can be found in almost any kitchen.
Further reading:
If you are a super-fan then this homemade taco seasoning is like gold dust to you, so keep some close at hand at all times!
The key to excellent chicken taco meat is in the preparation as well as the cooking. If this makes your mouth water, follow these restaurant-quality steps.
In a small bowl combine the chili powder, cumin, smoked paprika, garlic powder and onion powder, oregano, salt, pepper or cayenne if using. Vigorously combine with a small fork or whisk to break up any clumps of spice. Take a moment to smell this blend; it is the essence of your dish.
Tip: Double or triple the quantities and store the extra in a small airtight jar for future meals.
If the chicken breast is particularly thick it will cook unevenly, leaving you with a dry outside and raw inside. Place on the cutting board and, your choice, slice in half horizontally for thinner cutlets or gently pound with a meat mallet or the bottom of a heavy pan to an even thickness of about 1/2 to 3/4 inch (1.5 to 2 cm). Dab the chicken dry with a paper towel to remove excess moisture, which will promote a better crust.
Place the chicken in a large bowl or on a plate. Drizzle the olive oil and lime juice over it. Massage the meat well with your (clean!) hands to ensure it's fully coated. Then cover the whole surface of all sides of chicken with your spice blend. Don't be shy: the chicken should be completely covered in a fragrant, red layer. Rub it in well to get flavor at peace. If you have the time let it sit 10 to 15 minutes at room temperature so the spices can really permeate into the meat.
Heat a large skillet (cast iron is ideal) over medium-high heat. Add a little more oil if necessary, although the chicken is already dripping with the stuff. Now that the pan is heated (but not smoking), set the chicken pieces down. There's a satisfying sizzle immediately.
Let it cook untouched for 5 to 6 minutes. This part is crucial: don't move the meat! This is how that golden, spicy crust forms. Turn over the chicken. The cooked side should be beautifully brown and even a little charred in places (that's the natural sugars in the spices caramelizing, wonderful!).
Continue on the other side another 4 to 6 minutes, depending on thickness. If you have an instant-read meat thermometer, the internal temperature should reach 165°F (74°C). If you don't, the meat should feel firm when you touch it and the juices should run clear, not pink. Take the meat from the pan and immediately put it on a clean wooden cutting board.
Let it rest for 5 minutes before carving. This is the most crucial step of all: it's what keeps your chicken juicy, ergo -- the muscle fibers get to relax and redistribute all the juices evenly throughout.
Once it has rested, slice the chicken into strips or dice however you want to serve it. Marvel at the contrast between the juicy white inside and the sharp, crispy outside.
This chicken is the storage king, the savior of your week’s lunches.
In the refrigerator - Allow the chicken to cool completely, then place in an airtight container. It will last for 3 to 4 days. When reheating, if at all possible avoid the microwave for the problem that microwave-heated chicken often turns out very dry. Instead, try a quick reheat in the pan with a little water, or wrap well in foil and heat in the oven. But no matter what you do, don't reheat it twice.
Freezing - You can freeze the cooked chicken, either in slices or as whole pieces. Wrap it tightly in plastic wrap or put into a freezer bag (squeezing out the air). It will stay good for up to three months. Just leave it to thaw overnight in the fridge before use.
You are now equipped with all the secrets for making that taco-seasoned chicken of your dreams this weekend. This is the type of recipe that shows good food needs no more than good spirits and a touch of virtuosity with condiments to achieve perfection without long hours in the kitchen or any difficult ingredients.
Rewriting this article step by step as follows: This is really a believe-it-or-not recipe! So whether you have never done it in your kitchen before now is the time to try the easy recipe and make a name for yourself. The most enjoyable part of this recipe is watching to see how fast it will be a staple on your dinner table. Then take out the spices, put the old frying pan on the stove, and continue to be the charm of every meal at home.
Whether you like sending the pictures of things you make with us offhandedly mentioned in this recipe, whether you have photographed your own spice combinations or invented your favorite side dish, please let us know. Bon appétit!

Hello, We’re content writer who is fascinated by content fashion, celebrity and lifestyle. We helps clients bring the right content to the right people.


We must explain to you how all seds this mistakens idea off denouncing pleasures and praising pain was born and I will give you a completed accounts..
Consultation
Showing 0 verified guest comments