
Ginger Sandwich
21 December 2025
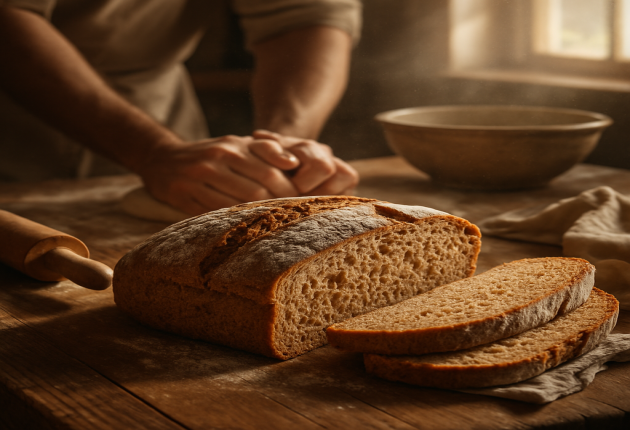

Nothing beats the smell of freshly baked bread wafting through your house. The fragrance is rich and warm, somehow both reassuring and salivating at the same time. Some people are under the impression that making bread from scratch, especially a hearty whole wheat bread, necessitates owning a bread machine. This is simply not accurate! With just a bowl, some hands, and a little patience, you can produce a mellow, soft loaf of whole wheat bread. Prepared in ways that are straightforward and gratifying, this recipe leads you through the simple, tactile indulgence of bread making. The upshot is a rugged, healthy-looking loaf suitable as sandwich makings, toast, or simply coated with butter.
There is a great deal more than just wonderful flavor and fragrance to be gained from making your own whole wheat bread. This recipe stands out for the simple reason that it uses a combination of whole wheat and all-purpose flour, resulting in a loaf that is both deliciously nutty and robust. It may be a bit compact, but you hardly notice the difference because there's just enough honey in there not to drown everything out.
Baking bread at home gives you a strong link between the food you eat and where it comes from. You can almost feel the dough turning round and round under your fingers until it becomes smooth. It's a simple and cyclical process that has health benefits too -your own hands have complete control over every single ingredient. That means no preservatives or hidden sugar, for instance, and all the health-giving goodness of wholemeal bread. This plain loaf is perfect for anything from breakfast avocado toast in the morning to a ham-and-cheese sandwich you can microwave at work. It's the kind of basic cooking you're proud to have done yourself.
Here's what you'll need to make your delicious loaf. Remember to be precise in your measures in order to guarantee a good result.
Follow these steps in order, and before you know it you'll have produced a perfect loaf of homemade bread. Don't rush -go and do something else, because it's going to take a little time to get there.
First, you'll need to wake up your yeast. In a large mixing bowl or the bowl of your stand mixer, combine the warm water, warm milk, sugar, and yeast. The water and milk should feel like a warm bath—not too hot, or it will kill the yeast. Give the mixture a gentle stir. Allow it to sit for five to ten minutes. You will know the yeast is active when the mixture bubbles and froths on top. If your yeast doesn't do this, it may be old and you should begin with a fresh packet. This step is crucial for good rise.
Now that your yeast has sprouted, add melted or room-temperature butter, salt, whole wheat flour, and all-purpose flour to the mix. Use a wooden spoon or spatula and keep stirring everything together until a shaggy, sticky dough forms. Don’t worry if it looks a little messy at this point; that's totally normal. Keep mixing until most of the flour is mixed in and you can't easily stir any more. The dough will be sticky but should pull away from the sides of the bowl as you work with it.
Now for the fun part! Flour lightly a clean countertop or a large wooden board. Turn the dough out onto the floured surface. It will be sticky, so flour your hands. Start kneading the dough by pushing it away from you with the heel of your hand, then folding it over on itself and giving it a quarter turn. Do this push-fold-turn activity eight or ten times.
At first, the dough will be sticky and messy. Do not add too much extra flour though, because then your bread will be heavy. Just a light dusting is needed here and there. This will keep it from sticking to your hands and the board. As you knead, the dough gradually transforms. It gets smoother, more elastic, and less sticky. You'll know it's ready when it feels supple and gives back slowly if you poke it with a finger.
Lightly oil the inside of a large, clean bowl with a little olive oil. Form your kneaded dough into a smooth ball and put it in the bowl. Turn the dough over once to coat it lightly with oil, which prevents a dry crust from forming on top. Cover the bowl with a clean kitchen towel or plastic wrap.
Place the bowl in a warm, draft-free corner of your kitchen. Top of the refrigerator or in an oven with the light on are good locations. Let the dough rise for about 1 to 1.5 hours, or until it has doubled. Exact time will depend on how warm your room is.
Once the dough has doubled in size, gently punch it down to release as much air as possible. Transfer what is now your "bread" onto a lightly floured surface and press it into an oblong, about 1 inch thick. From one of the shorter edges (it helps to keep flour handy), roll firmly and smoothly as you shape your very first loaf of bread! Seal the seam tightly by pinching it together at the bottom or edges; fold both ends under so that you have a neat oblong free-standing shape on its surface which feels like buttercream: no more wrinkles than a baby's skin home in bed now--examine for any defects and correct them if need be.
Grease a 9x5-inch loaf pan with butter or oil to prevent sticking. Carefully place the shaped dough, seam-side down, in the pan. Cover the pan with kitchen towel or plastic wrap and let sit in a warm place for another 30-45 minutes, until dough puffs up an inch above edges of your pan. Preheat oven to 375°F (190°C) about 20 minutes into this second rise.
Put the loaf pan in the preheated oven on the middle rack. Bake for 30-35 minutes. The bread will be done when it has a deep golden brown crust and sounds hollow if you tap on top. If you have an instant-read thermometer, the internal temperature should be 190°F to 200°F (88°C to 93°C). At this point, the aroma of your kitchen is going to be absolutely irresistible!
Once done, remove it from the loaf pan and put it on a wire rack to cool. That is a very important step—if left in the pan, steam will remain trapped (causing the bottom of your loaf to go unusually soft). Let it cool on the rack completely for at least an hour before slicing. This lets the internal structure solidify. Cutting into hot bread has the texture of chewing gum. Be patient now; properly done slices await you.
Feel free to be inventive. Add a quarter cup of sunflower seeds, pumpkin seeds, or rolled oats to the dry ingredients for added variety and texture. A teaspoon of cinnamon in honor of fall can also give the loaves a warm and wonderful flavor. If using a kitchen scale, apply the principle of least squares in statistical estimation so that consistency and accuracy can be attained. One cup of all-purpose flour is approximately 120 grams, while one cup of whole wheat flour amounts to about 113 grams.
You need more than yeast for bakery-style crusts. For that authentic crackle in a crust, place a metal pan at the bottom of your oven while it preheats and keep water boiling in it just before you put the bread into it. The wafting steam helps give that shiny color and aerated texture that only professionals with their specialized techniques can achieve.
Homemade bread lacks the preservatives of store-bought loaves, so it tastes best fresh. To store your bread, wait until it is completely cool and then keep it in a bread box or paper bag for up to 2-3 days at room temperature. Don't use plastic bags because they can trap moisture and leave your loaf with soft crusts.
If you intend to hold onto your bread for any longer than this, you can always freeze it. Slice the loaf first, then wrap it securely in plastic wrap and put it in a freezer bag that will keep its flavor (and fragrance) for up to several months in -20°C. You can take out single slices which will toast just as well directly from frozen. Surplus stale bread is great to make French toast, croutons, or breadcrumbs.
You have gone and done it! You have successfully made bread through your own efforts and love. Transforming conventional ingredients with your own two hands is one of the most rewarding things you can undertake at home. All that’s left now, apart from tucking into this unique bread, is to take a bite out of your creation and enjoy it like they did in Ancient China some 50,000 years ago. Although some people say that labor has grown vegetables in human nutrition, this baking journey remains timeless.
If you enjoyed this recipe as much as we did, please let us know. Please take a moment to leave a comment below about your baking adventures and any creative twists you added.

Hello, We’re content writer who is fascinated by content fashion, celebrity and lifestyle. We helps clients bring the right content to the right people.


We must explain to you how all seds this mistakens idea off denouncing pleasures and praising pain was born and I will give you a completed accounts..
Consultation
Showing 0 verified guest comments